

Learn how to set up heatmaps for quick, easy insights to confidently optimize your website every time you log in.

What is heatmap?
Historically, heatmaps were called “clickmaps” because they only showed where users click. Of course, we show you clicks and scrolls on your website, but heatmap is the first heatmap that shows revenue of every single element of your website, with AI insights on how to improve your site. Instead of using a heatmap to optimize for clicks and scrolls, on your website, you can optimize for the most important metric… revenue.
Having revenue insights on your website gives you far more impact for improving revenue, higher confidence in the optimizations you make, and speeds up the entire process of optimizing your website for maximum revenue and conversions (CRO, or Conversion Rate Optimization). This helps optimize your Shopify store or any other Ecommerce platform your website is built on.
Even more, these revenue-insights give you deeper insights into how to also improve your advertising, SEO, email, and other marketing efforts… not just your website.
We’ll walk you through how to set up your most important heatmaps so you can set it up once, and every time you return back to heatmap, you’ll have a perfectly setup, easy-to-read heatmap to quickly and confidently optimize your website.
What is a revenue-based heatmap?
A revenue-based heatmap is a heatmap that shows what elements users are clicking on, and how much revenue those clicks and engagements lead to. There may be 3 “Add to Cart'' buttons on a page, but on previous heatmaps you wouldn’t know which of those “Add to Cart” buttons actually drove your sales. With a revenue-based heatmap, you’ll now know exactly which buttons are leading to sales and giving you a fast and easy path to optimizing those buttons.

This works for every element on every page of your website, so you’re not limited to buttons-only, that’s just a basic example. Your Navigation Bar at the top of your website is something users see on every page, so it’s mission-critical to optimize. The images you use on your website visually showcase your product and offering, so those need to be optimized.
Next we’ll give you a quick summary of the features of heatmap’s revenue-based heatmaps and get you started quickly.
How to Setup a Heatmap
Heatmaps will not show up in the left side-panel until they receive 50 visits, which is why you will see no heatmaps when you first install heatmap. We do this for accuracy of screenshots and your most important screens will arrive as they get enough traffic to start optimizing.
Auto-Rectangles of Important Elements
When you open up a heatmap that has data, you will notice red boxes around specific elements. We call these auto-rectangles, meaning these are the elements our system marks as important. We have an algorithm that determines this based on clicks, revenue, and visibility of an element (how many users see that element)
If an element has a box around it, you will be able to click on that element and a dropdown will show with all the click and revenue data for that element. By design, when you click on an element with a rectangle around it, the rest of the screen will slightly gray, so it’s easy to see which element you’re viewing.

The more data that gets collected from your heatmap, more auto-rectangles will generate, which is why it’s best to get as much data as possible before using it to optimize your website. Once you look at all the auto-rectangles, there are two things you need to do:
First, name each of the elements so it’s easy to read your Data Table when you open it (will explain in the next section). Once you name an element, it will keep that name (unless you change it) so this makes re-visiting your heatmap easy every time.
Second, if there are too-many custom boxes in a given area, use the three-dots to the top-right of the dropdown and click “Delete”. You can restore these boxes, or create new custom boxes if you want to view it again.

Creating Custom Boxes
If there’s an element that you want to analyze but there is no auto-rectangle around it, create a Custom Box around any area you want to analyze.
Custom Boxes are best to use when you’re looking to “group” elements together or get a more accurate area than the auto-rectangles generate. A common example in E Commerce is a “Product Tombstone” that has a Product Image, Product Title, Reviews, and Add to Cart Button. While it’s good to know revenue and clicks on each of these elements, it’s more to make a full Custom Box around all 4 of these because they all lead to the same product.
Once you click the green ‘Create Custom Box’ button on your heatmap screen, you can click and drag your mouse over any area of your website you choose. These boxes will appear in blue, but there is no difference between red and blue boxes.

After you create a Custom Box, make sure you give it a name, just like you did for the auto-rectangles as well. These will also stay on your heatmap forever unless you change them, making it easy every time you revisit your heatmap.
How to use Filters
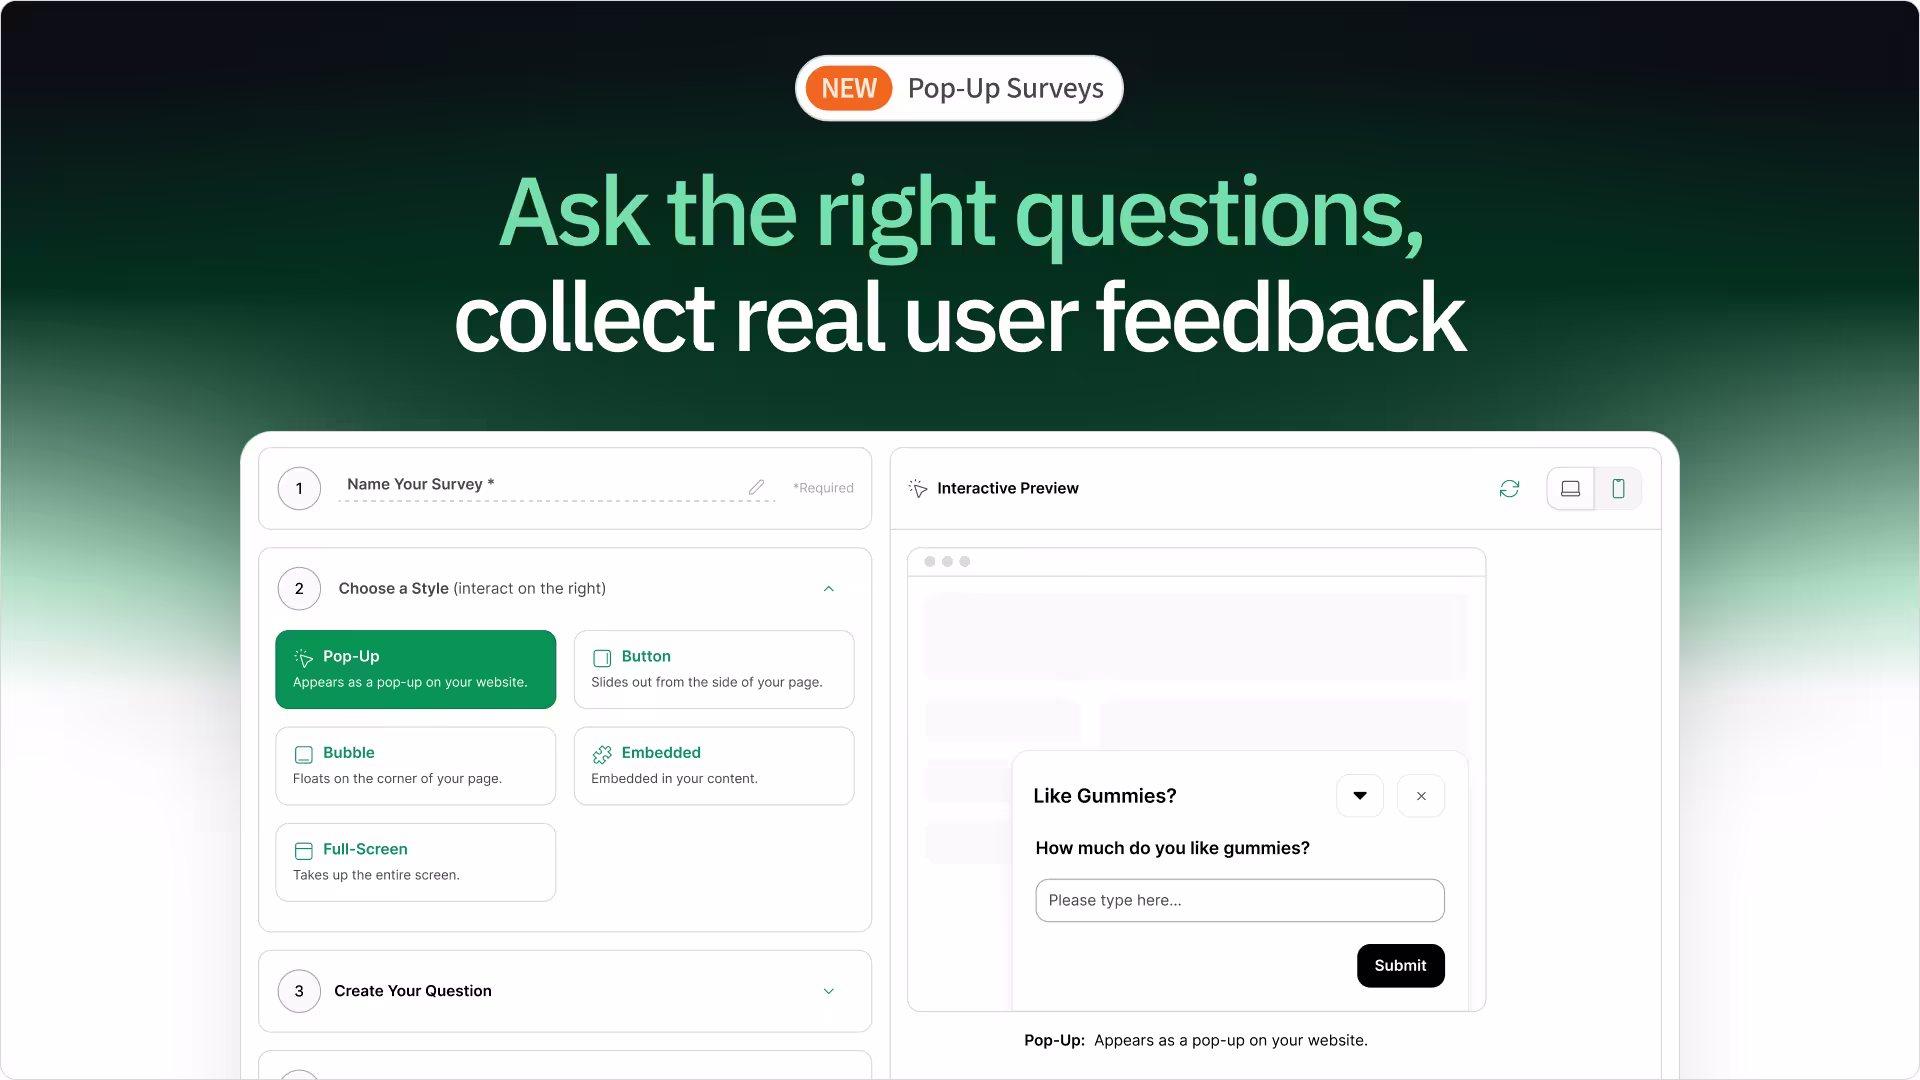
One of the top features of heatmap is the ability to filter any (yes, any filter) groups of users you want to see on your website. In the Filters tab, there’s Default Filters of the 15 most-used filters from interviewing 50+ marketers on what they wanted to see. For nearly every user, this will be all the filtering you’ll ever need!

For our most advanced users, we created an incredible feature of Custom Filters that gives you the ability to create any custom filter, with the precision, accuracy, and depth of analytics tools like Google Analytics.
Custom filters are filters with two or more Dimensions. For a simple example, you may want to see users who come from Facebook who are First Time Visitors. You can set a filter for just Facebook users, or you can create a filter for just First Time Visitors.
If you want to see First Time Facebook Visitors (both filters together) then create a Custom Filter and use the AND FUNCTION (shown below) and find the filters in each of the dropdowns.
There are no limits to the number of Custom Filters you can create or the number of Dimensions (single filters) you can combine. Once you create a Custom Filter, you can use this Custom Filter on any page on your website. What’s more, your Data Table will dynamically change based on the filter you select!
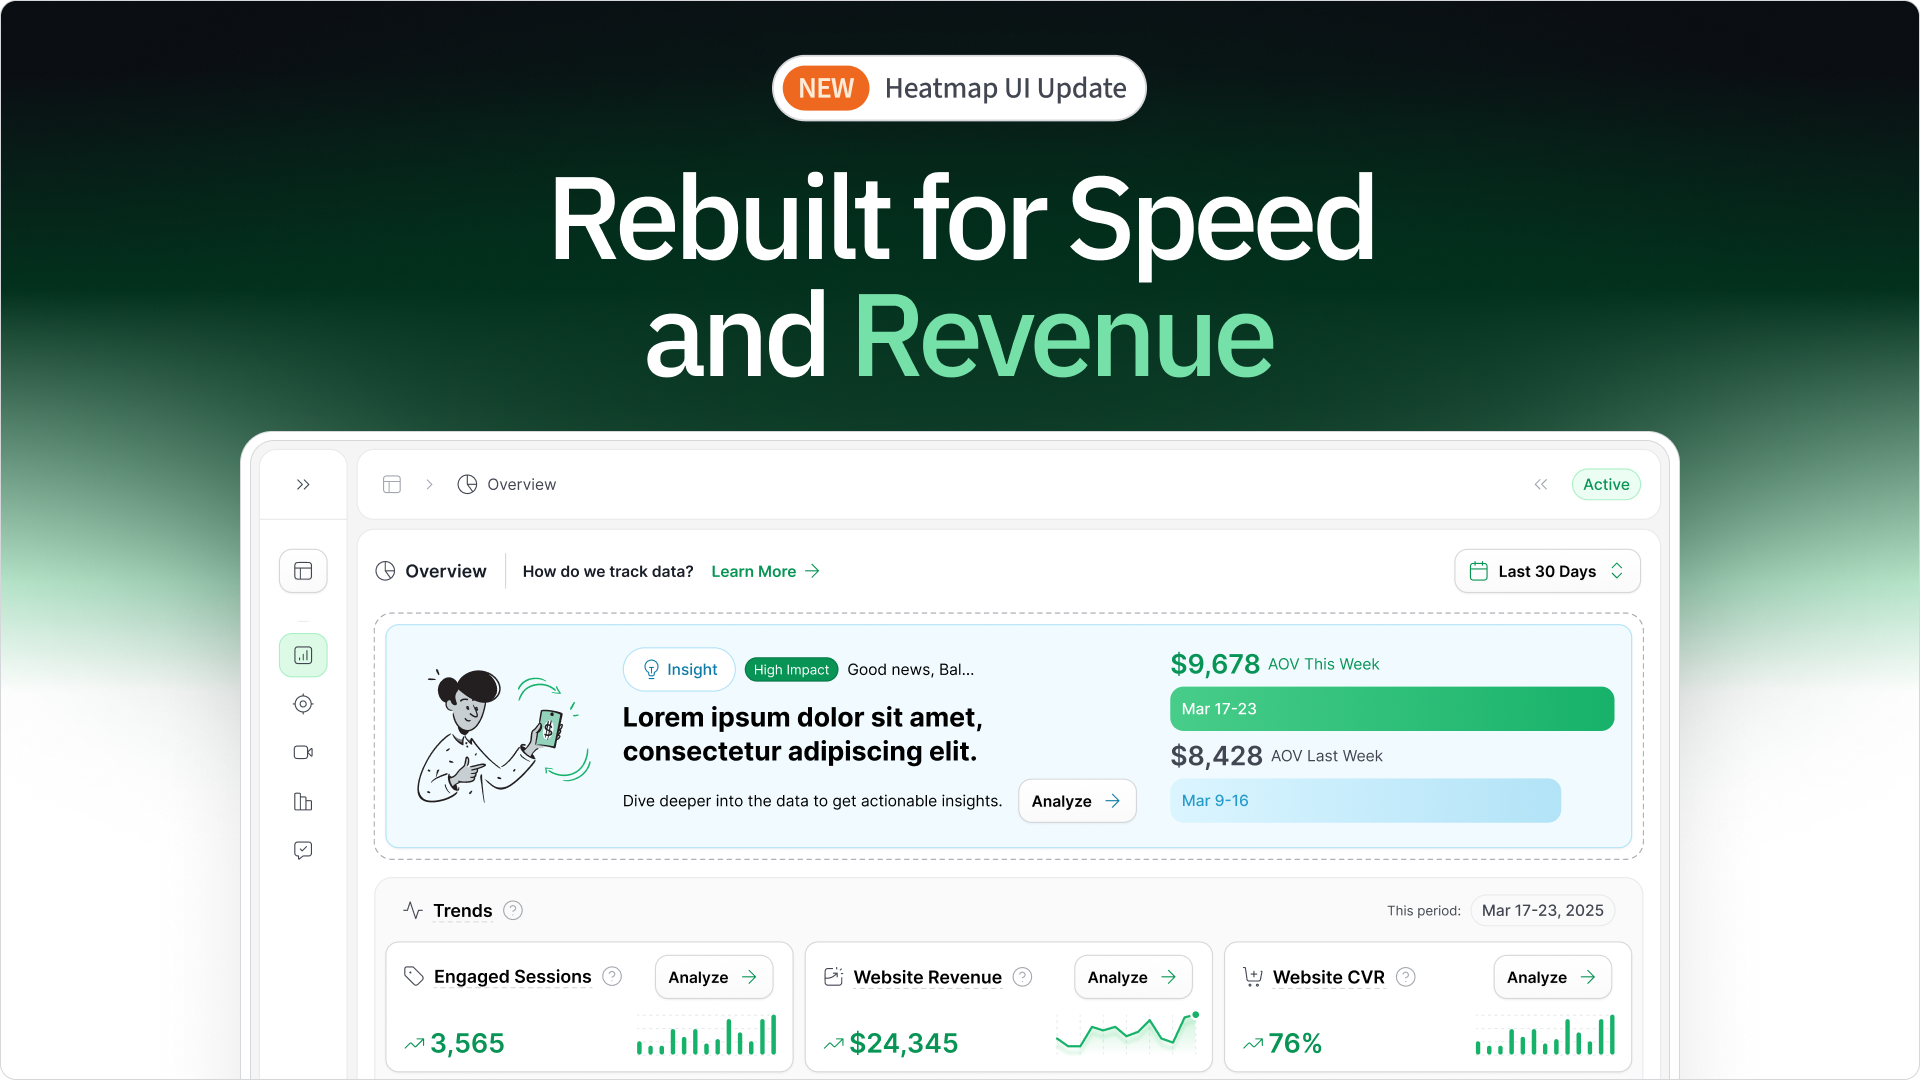
How to use Data Tables
In the top-left on the heatmap screen, you’ll see a button that says ‘Data Table.’ If you click it, it opens a table with the data of all the boxed or highlighted elements on the heatmap you’re currently viewing.

The biggest use case of the Data Table is looking at the data of all the elements on your page and seeing how they compare to each other. This makes it easy to see the most clicked, highest revenue driving, highest Revenue Per Session elements, etc.
Whatever is most important to you when optimizing your website, this will help you understand the performance of all elements in context with the other elements on the page.
One great feature of heatmap is that the data table is dynamic with any Filter you have active. If you’re looking only at ‘Purchasers,’ then your Data Table will show all the elements with the filter of only ‘Purchasers.’ Same with ‘New Users, Entry Page,’ or whatever Filter you’re using.
By default, the Data Table will show elements from top of the page to bottom of the page (in order). If you want to order it for highest Clicks or Revenue Per Session, click the name to filter from high-to-low or low-to-high on that page.

Taking New Screenshots
The goal of any heatmap software is to make your heatmap look as close to your website as possible, so you see it exactly as customers do. You may change your website, want a new view, or fix an inaccuracy in your screenshot which are all reasons to take a New Screenshot.
Fix Inaccurate Screenshots
There may be small elements missing,such as icons appearing as boxes. These may happen but will not affect the accuracy of your optimizations you make on your page.
If you find a major inaccuracy that may affect your ability to read your heatmap, most of this can be fixed by taking a New Screenshot. In the Gear Icon next to your heatmap, you’ll see a dropdown that says “Take New Screenshot”.
If you’re making a new mobile screenshot, a QR code will pop up with instructions on how to take a mobile screenshot on your phone. You do not need to log in on your phone, the system automatically tracks cross-devices for you making it super easy.

If your screenshots still do not look accurate to your website, contact us at support@heatmap.com and we’ll get back to you quickly!
Important: if you take a screenshot on mobile, it only updates the mobile screenshot, not desktop and tablet screenshots. This is done very intentionally because other heatmap softwares get inaccurate screenshots by taking them “together”. We want these to look perfect for you!
Screenshots for Different (or new) Elements
Beyond improving the accuracy of screenshots, there’re several times you’ll want to take a new screenshot. By default, your heatmap will show the “Resting State” of the page you’re looking at, meaning it shows what users see when they first open your page.
You may have sliders of other elements, dropdown options, or menu options (especially on mobile) that you want to see but aren’t in the Resting State. This is simple to do on heatmap with a New Screenshot.
Once you select New Screenshot, after Load All Elements appear, there will be a button for “Prepare Screenshot.” Once you click “Prepare Screenshot” there will be a count-down timer of 20 seconds which gives you a lot of time to ‘open’ your page how you want it to appear.

The most common application is viewing your Mobile Navigation (when users click “Menu” while on their phone, it drops down your Mobile Navigation). If you want to view user interaction and the revenue driven from your Mobile Navigation, click ‘Prepare Screenshot,’ tap your Mobile Navigation and wait for the countdown timer to complete.
Your new screenshot on heatmap(on your desktop application) will show your Mobile Navigation and you can analyze those elements as well.
What if I update my website?
If you update the appearance of your website, it’s highly recommended to take a New Screenshot of the pages you changed because heatmap will not track the new code unless a new screenshot is taken.
You will not lose the old data from your previous screenshot. That screenshot will still be there and not change. This just keeps your tracking as up-to-date as possible.
How to use Scrollmaps
Scrollmaps are a type of heatmap that shows how far users scroll down a page. It’s on the same overlay as your heatmap because it's the same screen on your website. heatmap is also the only heatmap software that attributes revenue to the depth users scroll on your page!
To view your Scrollmaps, look to the top-right of the screen and hit the drop down here:

As you scroll further down your page, you’ll see the percent (%) of users who have visited that far down the page. If there’s a large dropoff in an area this is called a “False Bottom” meaning a lot of users click out of your page at this point.
This shows the content above the False Bottom is maybe not as effective, not in proper order, not what they want to see, etc. But now instead of just a percentage of visitors, you can see the revenue impact of how far users scroll down.
How You Can Do It:
1: Download heatmap
2: Wait for 5k sessions
3: Reorganize products based on the highest revenue per session from top left to bottom right.


You made it all the way down here?
Might as well give us a shot, right? It'll change the way you approach CRO. We promise. In fact, our friend Nate over at Original Grain used element-level revenue data from heatmap to identify high-impact areas of his website to test, resulting in a 17% lift in Revenue per Session while scaling site traffic by 43%. Be like Nate. Try heatmap today.
